
TL;DR
JPEG is the practical upload choice when an AI headshot service accepts it; RAW is useful mainly for editing before export. Capture RAW when lighting needs adjustment, preserve natural facial detail, and check the service's current file requirements before uploading.
A RAW camera original and an AI-ready upload serve different purposes. The camera app RAW vs JPEG for AI headshot uploads decision starts with separating capture from delivery: RAW keeps image data available for editing, while JPEG provides a processed photograph that can be shared with compatible services.
RAW: A camera file containing largely unprocessed image data that must be rendered into a photograph.
JPEG: A processed image format that uses lossy compression to reduce file size; .jpg and .jpeg identify the same format.
For professionals preparing portraits for Looktara, the useful goal is a clear, natural-looking reference photo, not simply the largest camera file.
Table of Contents
What is the difference between RAW capture and JPEG upload?
RAW capture preserves camera image data for later processing, while JPEG upload supplies a finished, compressed photograph to a compatible service. For AI headshots, these aren't competing steps: a photographer can capture RAW, adjust the image, and export JPEG. The receiving service's requirements determine the final upload format.
RAW, JPEG, and RAW+JPEG compared
RAW, JPEG, and RAW+JPEG offer different balances of editing flexibility and preparation effort.
| Camera setting | File produced | Editing flexibility | AI headshot preparation |
|---|---|---|---|
| RAW | Camera image data requiring rendering | More latitude for tonal and color adjustments | Export to a format accepted by the service |
| JPEG | Processed, compressed photograph | Less latitude for substantial corrections | Upload directly if accepted and within limits |
| RAW+JPEG | Both files from the same capture | RAW remains available alongside a ready image | Use JPEG first; edit RAW if needed |
RAW doesn't mean untouched reality in every camera app. Some RAW workflows include computational processing, and a preview still reflects rendering choices. The label describes the file workflow, not a guarantee of an unaltered face.
JPEG processing can include white balance, sharpening, noise reduction, and contrast adjustments. Those choices may produce a useful reference immediately, especially under even lighting.
Capture quality and upload compatibility are separate checks
Upload compatibility depends on the service, not on a file's photographic potential. A camera may save RAW as .dng or another format, but that extension alone doesn't establish that an AI uploader accepts it.
Changing a filename from .dng to .jpg doesn't convert the image. Proper conversion requires software to render the RAW data and save a new JPEG.
Key distinction: RAW can improve the editing stage without being the file submitted to an AI headshot service.
By 2026, camera apps offer several capture options, but the current upload screen remains the authority for supported formats, dimensions, and file-size limits.
Who should choose RAW, JPEG, or both?
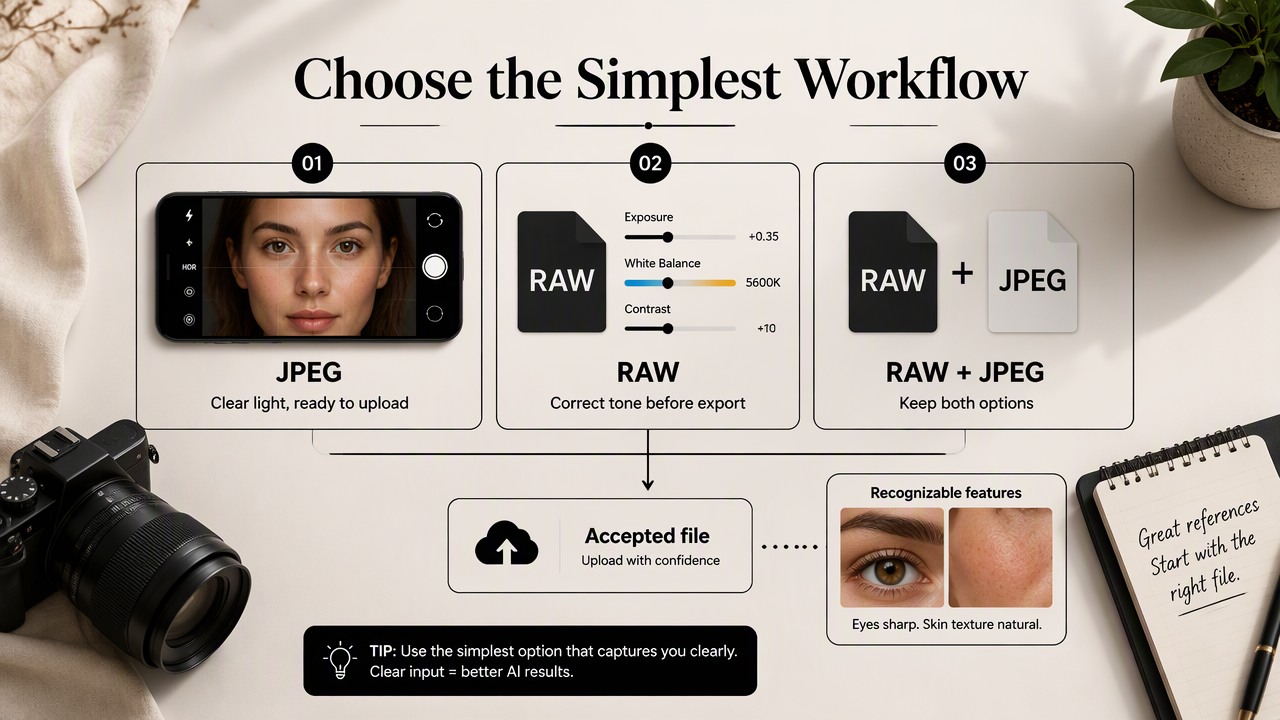
JPEG suits straightforward portraits in good light, RAW suits photos that need careful exposure or color adjustments, and RAW+JPEG suits photographers who want both options. For AI references, the best choice is the simplest workflow that preserves recognizable facial features and produces an accepted upload file.
Choose based on lighting and editing needs
The scene matters more than a blanket rule that serious portraits must use RAW.
- Choose JPEG for evenly lit photos that already show clear eyes, natural skin texture, and believable color.
- Choose RAW when a useful portrait needs moderate white-balance or tonal correction before delivery.
- Choose RAW+JPEG when the camera supports it and storage allows keeping an editable original alongside a ready photograph.
A freelancer photographed beside a window may need only a JPEG. A business owner photographed under mixed indoor lighting may benefit from adjusting a RAW original first. Neither situation establishes a universal winner.
Prioritize a faithful face over dramatic editing
A faithful reference preserves identity more directly than an elaborate photographic finish. Strong skin smoothing, face reshaping, and eye enlargement change the information the portrait is meant to provide.
RAW also cannot restore focus that was never captured or reveal a face hidden behind sunglasses. A better-lit replacement photo is often more useful than extensive repair.
The 2021 review of artificial intelligence in creative industries by Nantheera Anantrasirichai and David Bull examines the broader role of AI in creative work. It isn't a RAW-versus-JPEG upload benchmark, so it shouldn't be treated as evidence that either format improves headshot results.
How can RAW photos become natural-looking JPEG uploads?
- Open the RAW photo in a compatible editor.
- Set white balance for believable skin color.
- Adjust exposure while retaining facial detail.
- Keep texture and facial proportions natural.
- Export a high-quality JPEG within the service's limits.
- Inspect the exported image before submitting it.
Render the original with restrained adjustments
Restrained editing makes the reference easier to evaluate as a photograph of the actual person. Start with overall brightness and color rather than cosmetic retouching. Skin should resemble the person under neutral light, not an orange preset or a blue cast.
Check the forehead, cheeks, and area around the eyes. Brightening the whole image may help a dark face, but excessive adjustment can wash out useful detail. A small correction is preferable to forcing a badly exposed image into service.
Keep sharpening moderate and inspect edges around hair, glasses, and the jaw. Strong sharpening can create halos; heavy noise reduction can erase skin texture. Preserve ordinary freckles, lines, and facial asymmetry.
Export once, then inspect the actual upload file
A deliberate export creates the delivery file without replacing the editable original. Choose JPEG in the editor's export controls, rather than saving a screenshot of the preview.
- Color: Use an ordinary photographic export profile such as
sRGB, unless the service specifies another requirement. - Size: Follow stated pixel dimensions and file-size limits; there isn't a universal AI headshot limit.
- Compression: Begin with a high-quality setting, then reduce it only as needed to meet the limit.
- Framing: Keep the face clear and follow the service's guidance for head, shoulders, and background.
- Storage: Retain the original separately so another export can be made later.
Open the saved JPEG and inspect both the full portrait and facial detail. The exported file, not the editor preview, is what the service receives.
Avoid repeatedly editing and resaving the same JPEG. Each lossy save can introduce additional compression artifacts. Returning to the RAW original for revisions keeps the workflow cleaner.
How Looktara handles this
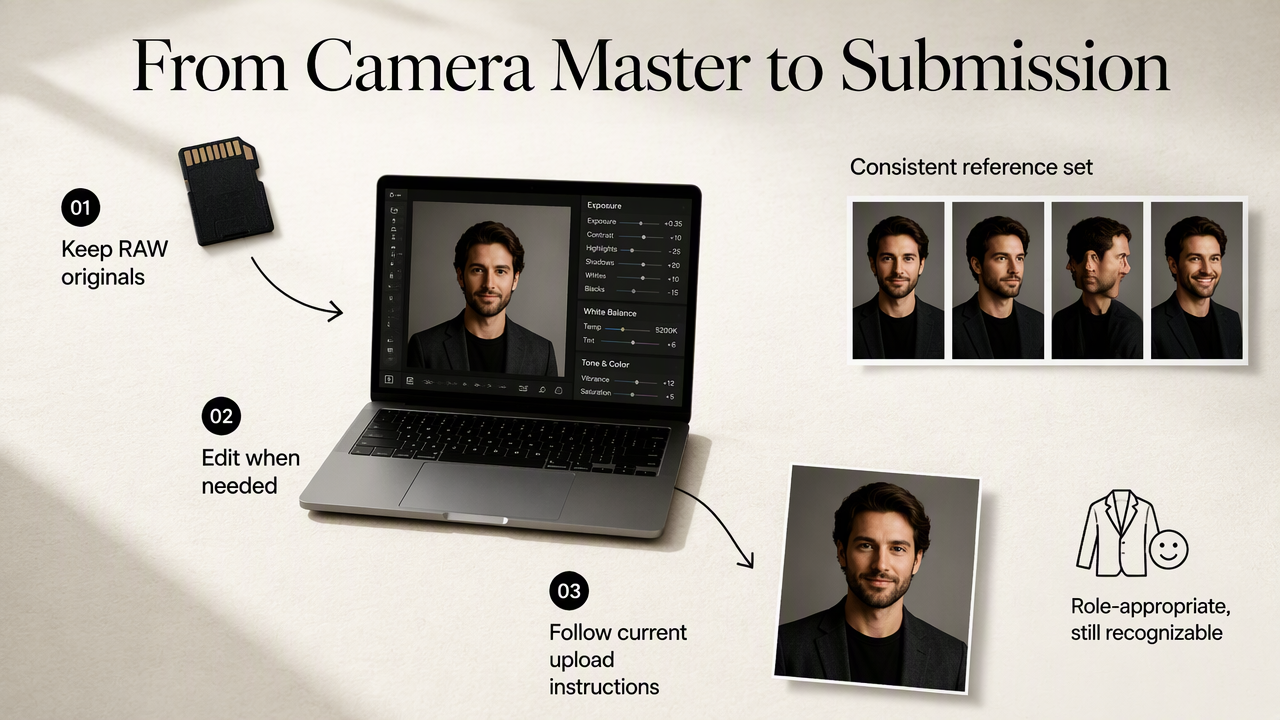
Looktara fits the delivery stage of the workflow: portraits should be prepared against the platform's current upload instructions, while RAW originals remain available for editing. The practical distinction is between a camera master and a submission file, rather than assuming one format is always best for every service.
Match the prepared portrait to its professional purpose
A professional reference set benefits from clear, recent photographs that consistently represent the same person. For a LinkedIn-focused project, expressions and grooming should fit the intended role while remaining recognizable.
Fitness professionals can explore the LinkedIn resume headshot generator as a relevant next step after preparing their source portraits. The camera-format decision belongs earlier in that process, where lighting and restrained editing establish useful reference material.
A simple preparation sequence keeps the work organized:
- Select clear portraits that reflect the person's current appearance.
- Finish any necessary RAW adjustments and create delivery copies.
- Check the current upload instructions at looktara.com.
- Submit files that match those instructions and review the resulting portraits.
This approach preserves editing flexibility without making the upload process depend on the camera's original file type.
FAQ: Camera formats and AI headshot references
Camera-format questions usually come down to whether a photo needs editing and whether the final file meets the receiving service's requirements.
Quick rule: Keep the best original available, then create the simplest compatible delivery file.
Does shooting RAW automatically produce better AI headshots?
Shooting RAW doesn't automatically produce better AI headshots. RAW offers more editing latitude before export, but the usefulness of a reference also depends on lighting, focus, expression, framing, and natural facial detail. A well-lit JPEG can be a stronger reference than a RAW photo with blur or an obscured face.
Can a camera RAW file be uploaded directly?
A camera RAW file can be uploaded directly only when the receiving service explicitly accepts that format. Support may depend on the file extension and processing system. When instructions require JPEG, the RAW original needs a proper export through a compatible editor; renaming the extension doesn't produce a valid JPEG.
Is the highest JPEG quality setting always necessary?
The highest JPEG quality setting isn't always necessary, particularly when it exceeds an upload limit. The practical aim is a clear image with natural facial detail and no distracting compression artifacts. Start with a high-quality export, inspect it, and adjust dimensions or compression only enough to satisfy the stated requirements.
Should phone beauty filters remain enabled for reference photos?
Phone beauty filters are best left disabled when they reshape facial features or strongly smooth skin. Reference photographs should show the person rather than an altered version of the person. Normal camera processing is different from cosmetic modification, so reviewing the saved image matters more than relying on the setting's name.
Conclusion
For camera app RAW vs JPEG for AI headshot uploads, the practical decision is simple: capture RAW when editing flexibility is useful, otherwise start with a clear JPEG. Keep facial detail natural and inspect the final delivery file.
For a professional portrait project with Looktara, the next step is to select recent, well-lit reference photos, prepare compatible exports, and confirm the current upload instructions before submission.
Generated by EarlySEO.com